How To Install A Line Output Converter (LOC) In Your Car
What to do if you want better sounding music, but don’t want to replace the head unit? Simple: get a Line Output Converter (LOC).
Does it really take getting extra equipment to help you reach your desired fidelity even if you already have aftermarket speakers and an amplifier? Unfortunately, yes, but the good news is that installing a Line Output Converter is quite easy and they’re not expensive either.
Installing a new head unit is out of the question for many of us. There’s no doubt car manufacturers are making it awkward to upgrade them as some features could be lost with an aftermarket car radio replacement.
Without upgrading the head unit you will need a LOC because most factory car radios don’t have the necessary preamp outputs that you need to connect the head unit to the amplifier.
This is exactly what a Line Out Converter does: Basically, a LOC converts the speaker-level output into an RCA signal, which will allow you to the connect your OEM head unit to your car amplifier.
After the How To Install A Line Output Converter step-by-step guide, you’ll find plenty of FAQs regarding LOCs, so if you are still need any questions answered scroll to the bottom before beginning installation.
To find our recommended LOCs, click here for a full review. If you already have one and just need to know how to install a Line Output Converter, read on…
Related Reading
LOC vs DSP – Which to get for a Car Stereo System?
How To Install A Line Output Converter
Before starting, you need to make sure you have the right tools in place. These may vary, but for most installations, these tools will do.
- Panel Pry Tools/Radio Removal Key
- Screwdrivers
- Wire Stripper/Crimper
- Electrical Butt Connectors
- Electrical Tape
- Wire
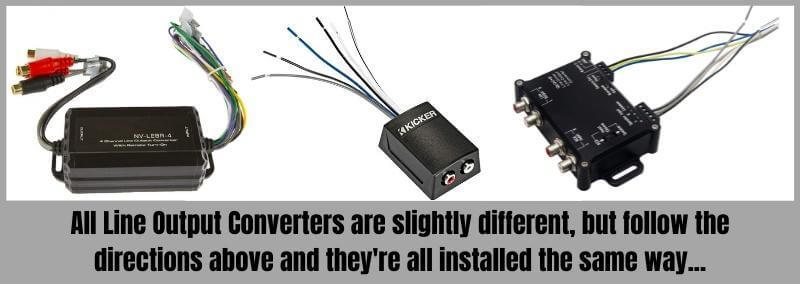
Once you have the right tools, you’re ready to learn how to wire a Line Output Converter (LOC). Now follow this step-by-step guide:
Disconnect The Battery
Before starting any electrical job on your car, you should disconnect the battery at the negative terminal.
Remove The Head Unit
Once you have disconnected the negative terminal, you’re good to start and the first thing you should do is remove the factory head unit.
You need to do this so you can locate the factory wiring harness that hosts the wires that you’ll tap into to connect the LOC. Depending on your car radio, you’ll need either some pry tools or a radio removal key, but simply ease it out so you can get into the back.
Review Your Wiring Diagrams
At this point you really need to ensure you know which wires are for what, so reviewing the wiring diagram for both your head unit and your LOC is a good idea.
For the head unit you need to know the stereo output wiring that will connect to your LOC. And your LOC wiring diagram should show you exactly which connector terminals are for which wires.
Depending on your LOC, each unit should come with the following wires, maybe different colors:
- +12 volt power input (yellow)
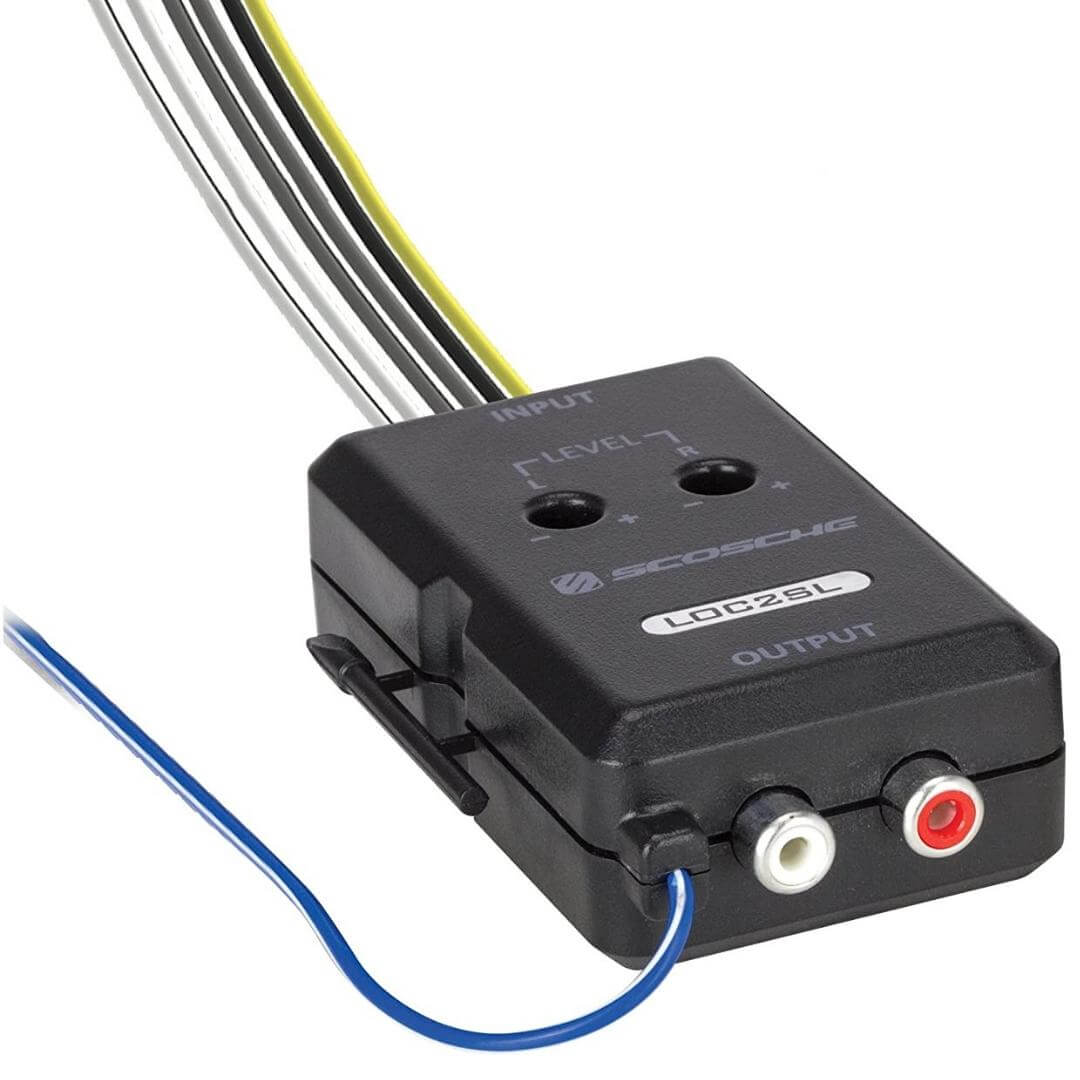
- Left + (white)
- Left – (white/black)
- Right + (grey)
- Right – (grey/black)
- Chassis Ground (black)
- 12V Remote Output (blue)
Splice Wires and Prepare To Connect Them
Once you know the wires you’ll be connecting, you need to get your wire strippers and remove about 1 inch from both the Line Out Converter and the wires in your speaker wires in the harness, and your amplifier for the remote turn-on output.
Connect LOC Wires To Head Unit Wires
Once all wires are spliced, you’re ready to connect them. I like to use butt connectors to connect the wires as I think they offer a sturdy connection as long as you crimp them properly. You can solder them if you prefer.
Simply get each corresponding wires from the LOC (on input side) and the wiring harness and twist the pairs together so they are fully entwined. Then slip them (both twisted wires) into the butt connector and give it a good crimp so it is securely connected.
Once you have crimped the end of the butt connector with both wires (see image), put the corresponding wire that you cut from into the other side of the butt connector. Once done, give them a good tug to make sure you have a secure connection. Do this for all wire pairings. Once done, it’s a good idea to put some electrical tape around all your wires so they are together and secure.
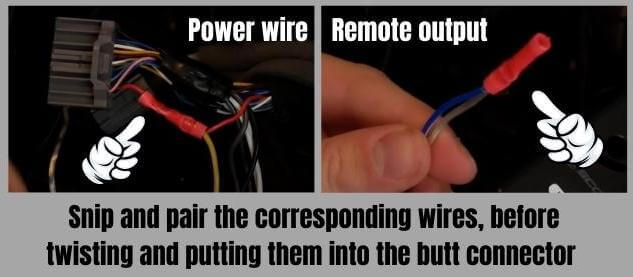
Do the same with the blue remote wire (on output side), but for this you just twist it with the wire that runs to your amplifier into the same end of the butt connector. There will be no other wire leading into the other side as you’re just tapping into the amplifier wire for your remote (see image). Again, it’s a good idea to put plenty of electrical tape around it so the wires don’t interfere with any others.
Your wiring diagram that you get with your Line Output Connector will clearly explain which wires to connect.
Plug In Your RCA Cables To LOC
Once you’ve connected all wire pairings, you’re now ready to plug your RCA cables from your Line Out Converter to your amplifier. Make sure you put the same connector into the corresponding terminal on each device: + to + terminals and – to – terminals on your LOC and amplifier.
Test Your New Installation
Once you’re all connected up it’s time to test your new installation before putting everything back. Simply re-connect your battery at negative terminal, and switch on your head unit and make sure your speakers and amplifier are working optimally.
If something isn’t working you should re-check every wire connection you’ve made.
Put Your Head Unit Back
If everything is working correctly, clean up all the wiring, making sure no strands are in there, secure your LOC, and put back your head unit.
Congratulations, you’ve now installed your Line Output Converter and you’re ready to enjoy your aftermarket car stereo to the max. Enjoy, but remember to respect the neighbors!
Line Output Converters (LOC) Frequently Asked Questions
What is a Line Output Converter (LOC)?
A LOC is a device that converts speaker-level output signal into an RCA preamp-level signal. This is necessary for most factory head units as most don’t have the necessary outputs to connect to an aftermarket amplifier.
Do all Line Output Converters need power?
Not all, do, but most will. If you have/need a passive LOC it won’t need a power connection. Other LOCs require 12v power to output a signal, as these will also power more volume.
Can I use a LOC if my head unit already has preamp outputs but not enough for new speakers?
Yes, of course you can. Simply use the preamp outputs on your head unit for the speakers you’ve been using them before, and install a LOC to connect to the new speakers and bulk up your car stereo system.
Will the speakers I’m tapping into lose sound if they’re sharing a connection?
No. As long as you’re only tapping the speaker wires to add additional amplifier or speakers, then you’ll still get audio from those speakers, and the LOC will receive the signal it needs to power the other speakers, too.
Are all LOCs capable of powering all amplifiers?
No. You should always check which LOC you buy before getting one. For example, if you want a LOC that will power a monoblock amplifier, then you won’t need as many outputs, but if you’re running a 5 channel amp, you’ll need more outputs.
Can I get an amplifier that doesn’t need a Line Out Converter?
Yes, sure. You can get an amplifier that offers speaker level inputs. For this type of amplifier, the speaker-to-line conversion is done inside the amplifier. Many powered amps offer this.
Watch This Video For Directions on Installing A LOC

I am a passionate and skilled car audio enthusiast with 15 years of experience in the industry. My journey started when I replaced my first set of factory car speakers, sparking a deep love for high-quality sound. Since then, I have worked as a representative for renowned brands like Kenwood and Alpine.
With a background in both retail and distribution, I have developed a comprehensive understanding of the car audio market. Currently a certified (MECP) installer in the Mobile Electronics industry, my expertise lies in delivering top-notch audio installations. My knowledge, coupled with my genuine passion, makes me the go-to professional for all car audio needs.